Using Aseprite with Hex Engine
Hex Engine has first-class support for Aseprite, the animated sprite editor and pixel art tool. You can import *.aseprite files directly like they were JavaScript files, and draw their frames in your Components.
If you tag frame sequences, they will be exposed as animations.
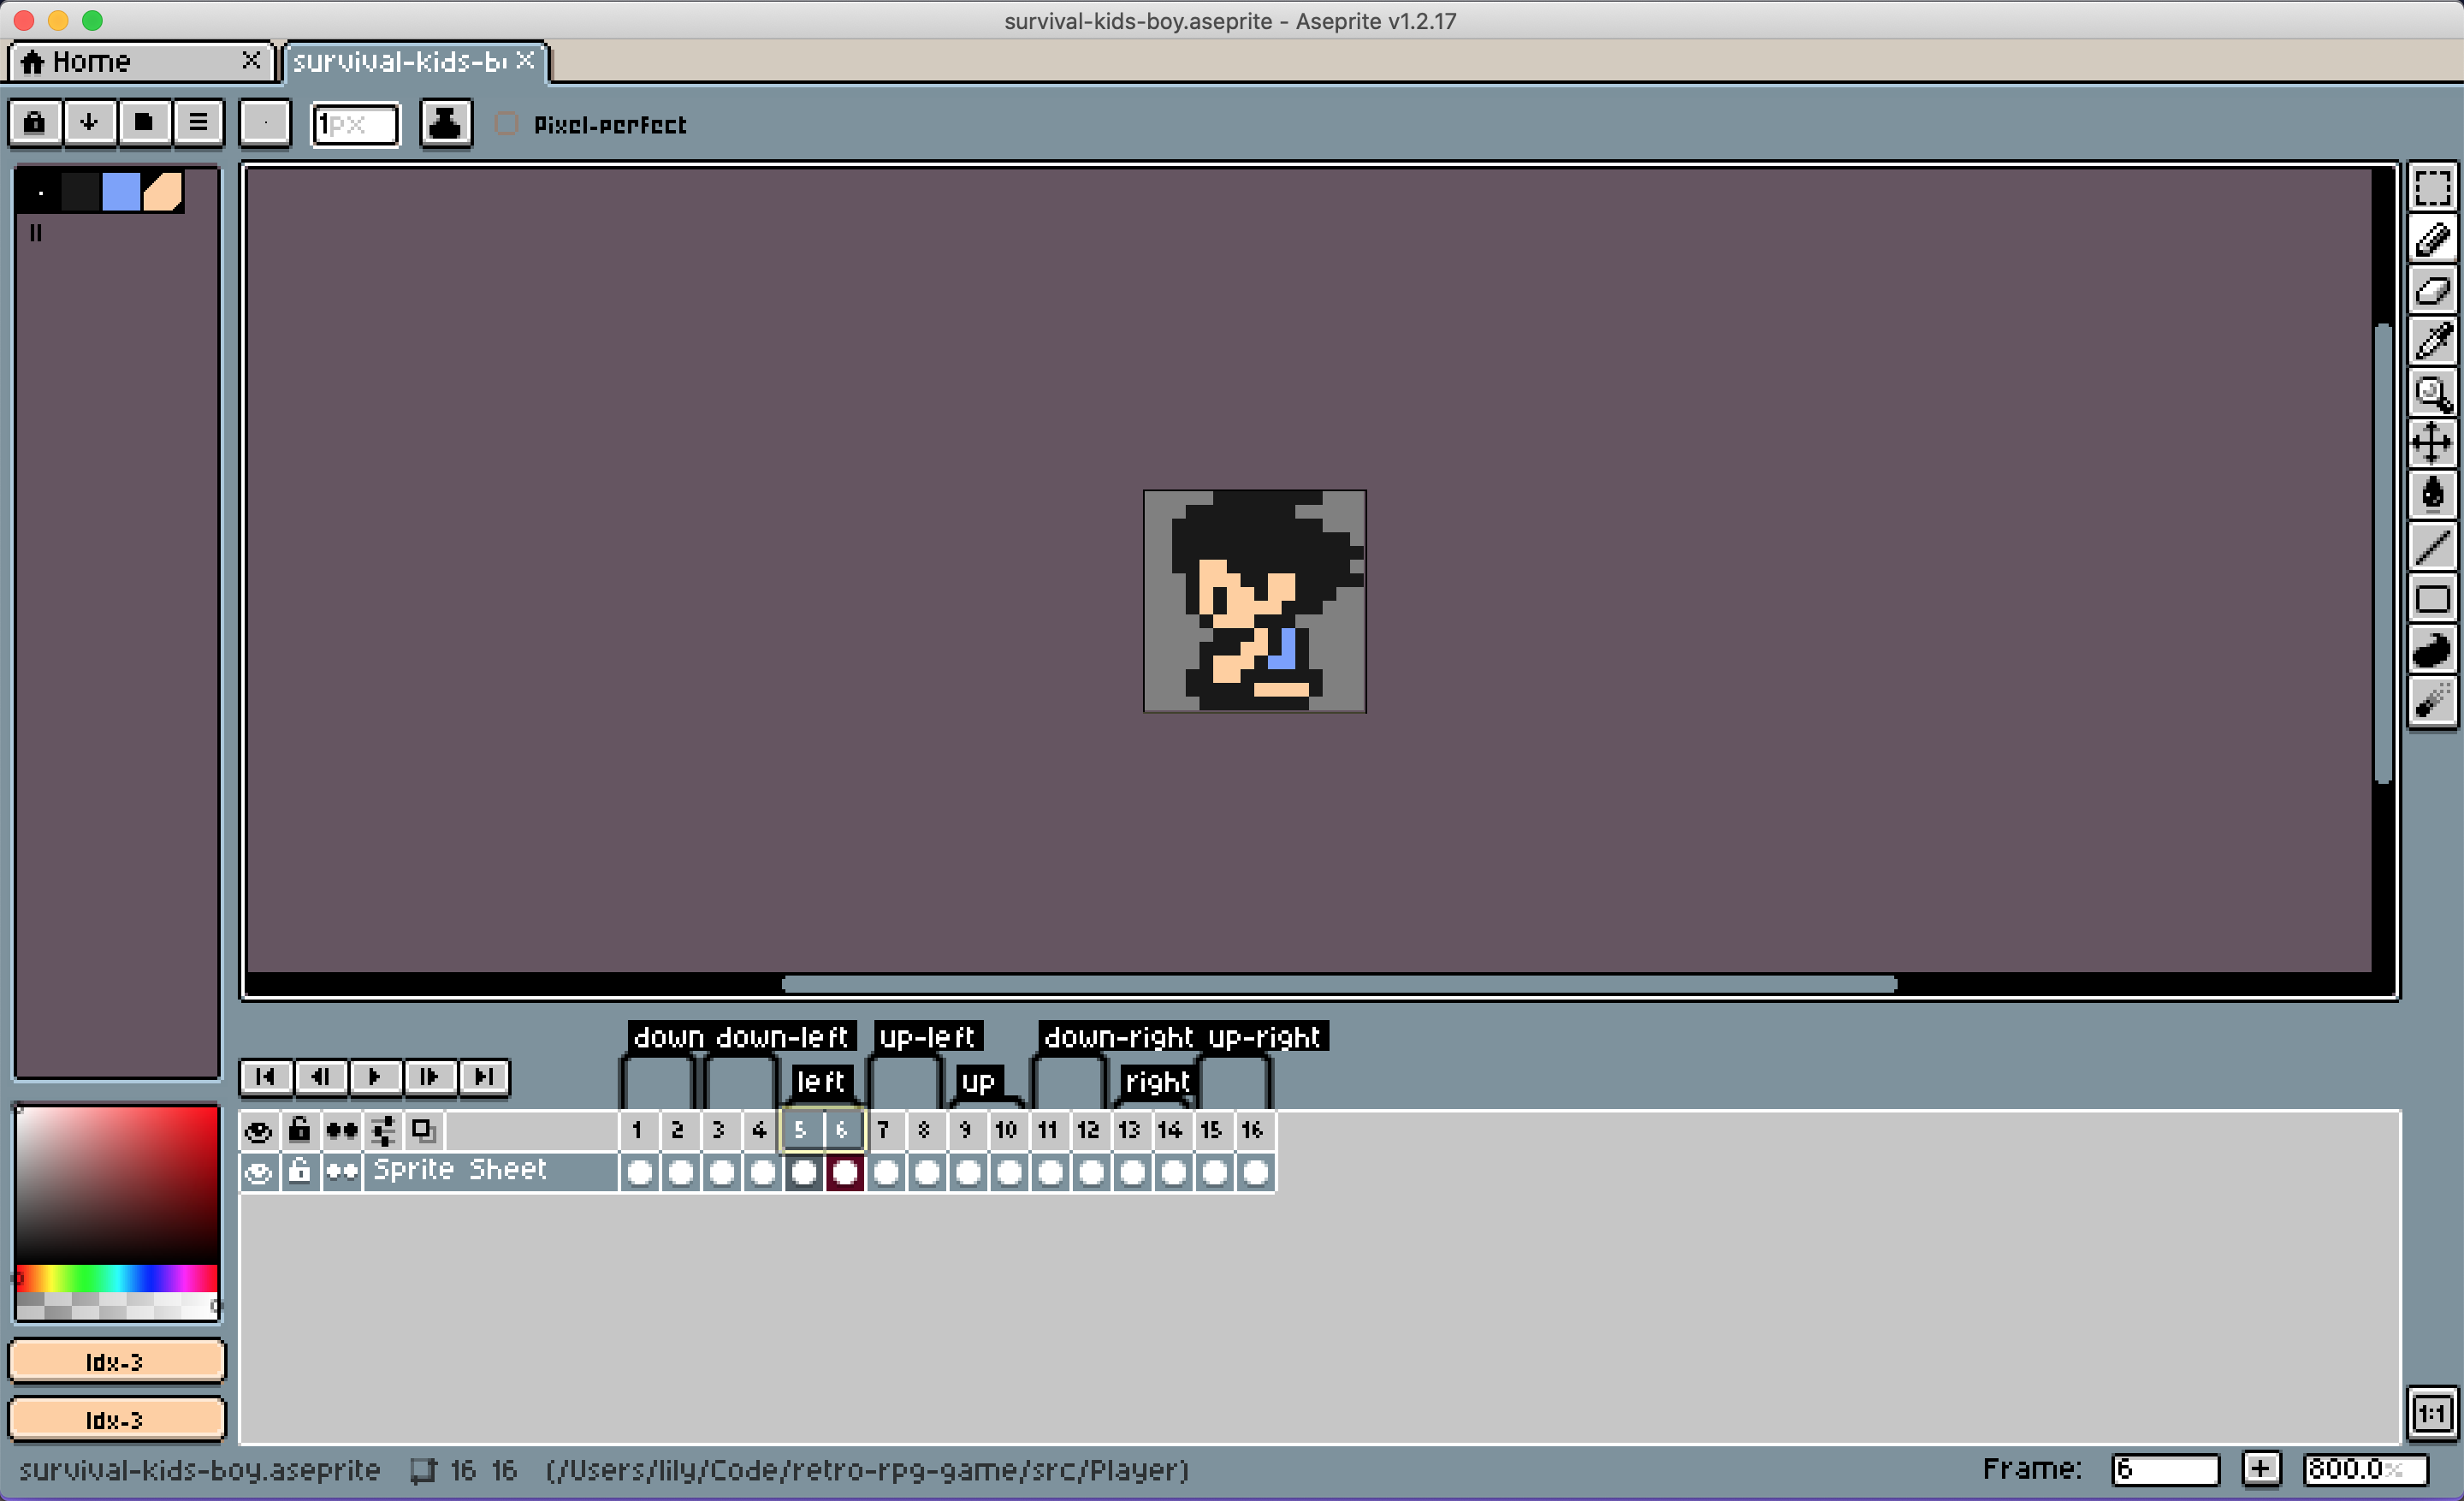
Take this sprite, for example:

As you can see, all the character frames are together in one Aseprite document, and I've tagged the various animations.
To load it in our Hex Engine game, we need to save it as *.aseprite, and then put it in the same folder as our Hex Engine code. Then, we can import it:
import playerSprite from "./survival-kids-boy.aseprite";
Once we've imported it, to use it in a Hex Engine Component, we can pass it into the Aseprite component from hex-engine/@2d:
import playerSprite from "./survival-kids-boy.aseprite";import { useType, useNewComponent, Aseprite, useDraw } from "@hex-engine/2d";function Player() {useType(Player);// Pass in the aseprite data:const sprite = useNewComponent(() => Aseprite(playerSprite));// All the tags are turned into animations and stored on the `animations` property of the Aseprite component.// To set the current animation, we write to sprite.currentAnim:sprite.currentAnim = sprite.animations["down"];// By calling play(), we start advancing through the animation's frames.sprite.currentAnim.play();// Then, we can draw the sprite onto the canvas in our draw callback:useDraw((context) => {sprite.draw(context);});// We can change the animation at any time by updating sprite.currentAnim:sprite.currentAnim = sprite.animations["down-left"];// When doing so, we might want to restart the animation:sprite.currentAnim.restart();}
The animations on the Aseprite Component use the same AnimationAPI type returned from the Animation component.
Notes
When you import a *.aseprite file, you get an object of type AsepriteLoader.Data, as defined below:
interface Data {frames: Array<Frame>;layers: Array<Layer>;tags: Array<Tag>;palette?: Palette;fileSize: number;width: number;height: number;numFrames: number;colorDepth: number;numColors: number;pixelRatio: string;colorProfile: {type: string;flag: number;fGamma: number;};}interface Palette {paletteSize: number;firstColor: number;lastColor: number;colors: Array<Color>;}interface Color {red: number;green: number;blue: number;alpha: number;name: string;}interface Cel {layerIndex: number;xpos: number;ypos: number;opacity: number;celType: number;w: number;h: number;rawCelData: Uint8Array;}interface Tag {name: string;from: number;to: number;animDirection: string;color: string;}interface Layer {flags: number;type: number;layerChildLevel: number;blendMode: number;opacity: number;name: string;}interface Frame {bytesInFrame: number;frameDuration: number;numChunks: number;cels: Array<Cel>;}
However, in most cases, the Aseprite Component should handle all the details for you, so you won't need to work with these objects directly.